Image Processing and the Juno JunoCam
 JunoCam Jupiter Perijove Polar Time Lapse Sequence
See the Juno Polar View of Planet Jupiter Generative Painting on Redbubble
To begin, note that this is not a step-by-step how-to tutorial on processing JunoCam images. Rather it is a general discussion of the challenges of working with JunoCam images. For background, my original exposure to working with NASA planetary images was with respect to the Mars Global Surveyor and Viking Orbiter imagery. I did this as a way of providing unique illustrations for the Mars presentations I used to give regularly. I subsequently did some limited work with Mars Odyssey and Mars Exploration Rover images but that coincided with a time at which my interests migrated to other areas. I only recently returned to planetary image processing and that was with respect to a presentation I developed about the New Horizons mission to Pluto, which I gave at multiple venues including Makers Faire Milwaukee.
More recently I've been working with imaging data from Earth observation satellites that show just how beautiful our home planet is. You can see some of those images in my Redbubble Planet Earth Satellite Imagery Gallery.
My interest in the Juno mission to Jupiter and JunoCam was initiated after I arranged for a scientist friend of mine to give a presentation on the Juno mission to a meeting of the Chicago Society for Space Studies. I was rather quickly drawn in to exploring different ways by which JunoCam color image output could be constructed.
About JunoCam
Briefly, JunoCam, formally the JUNO EPO CAMERA, is the visual imaging camera on the Juno spacecraft orbiting Jupiter. JunoCam was builit by Malin Space Science Systems, the same folks who built the cameras for Mars Global Surveyor and other missions. For a more detailed description see NASA PDS JUNO EPO CAMERA Description. The EPO part of JunoCam's name stands for Education and Public Outreach. For an in-depth project review, see Junocam: Juno’s Outreach Camera PDF. For purposes of this article, I am focusing on the "amateur image processing community will help process the data" aspect of the mission.
To construct visual light color images, JunoCam makes observations in three visible light bands: red (600–800 nm), green (500–600 nm), and blue (420–520 nm). A single JunoCam image set consists of individual strips created as a consequence of the camera's push-frame design with one strip being acquired with each rotation of the Juno spacecraft. Each strip is composed of three individual images: one each for the red, blue, and green light bands. Image A below is the raw data associated with the image used for this story.
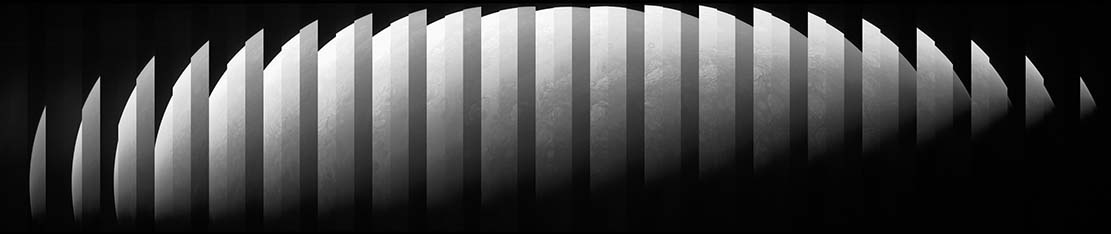
Image A: JunoCam Raw Data Image
Lining up these individual strips is a challenging process but one we need not worry about since we are provided with pre-assembled versions of the red, green, and blue channels.
JunoCam Image Processing Overview
For this article, the Junocam observation I am working with is ImageSet 893 from Perijove 5. If you like, you can either download the zip file for the images from Imageset893 or visit the Junocam web page for ImageSet893 from which you can also download the images. The three files that are used to construct the color image are:
- JNCE_2017033_04C00109_V01-red.png - for the red color channel
- JNCE_2017033_04C00109_V01-green.png - for the green color channel
- JNCE_2017033_04C00109_V01-blue.png - for the blue color channel
I've worked with a number of JunoCam images but have never followed the same workflow twice. In fact I find the experimentation with different workflows and methods to be the most fascinating aspect of working with these images. Of course the beauty of the Jovian cloud structures makes the work that much more appealing, particularly since they serve as a wonderful basis for generative paintings. For an example, see Winds of Jupiter Generative Painting applied to a graphic t-shirt.
With respect to the workflows I've explored, I have used the following software products to process JunoCam images:
- Adobe Photoshop - the most popular image creation/processing software on the market today.
- Astronomical Image Processing for Windows (AIP4WIN) - image processing software designed for the astronomical community, especially astrophotographers.
- Astra Image - image processing software for photographers.
- RawTherapee - multi-platform image processing software oriented towards work with Camera Raw files. The software is free and can be downloaded from the RawTherapee web site.
- Fiji ImageJ - the Fiji distribution of ImageJ2 image processing and analysis software with bundled plugins. This free software can be downloaded from the Fiji ImageJ web site.
Each of these software packages has its own set of strengthes and weaknesses with these attributes revolving around the set of tools that are included within each product.
In working to construct color images from the three individual images grayscale images that represent the red, green, and blue color channels, you may find it useful to read two articles I've written on the subject. The first and more useful in terms of this article is Satellite Images of Planet Earth. Less useful is the second which focuses on working with FITS image files (the file format used for astronomical images): Photoshop for Astronomy: An Introductory Tutorial.
The real challenge in working with JunoCam images lies in pushing the pixels both in terms of contrast and color so as to create an attractive image. The reason this is a challenge is because the image processing techniques used to enhance the image can also enhance the underlying imaging artificats to the point that they become a major distraction.
The challenge of enhancing JunoCam images has to do with the nature of the artifacts that are present as a consequence of each color channel's master image having been assembled from many smaller strips of images. In Image B below, I have converted the color composite image from RGB into the LAB color mode and stretched the histograms associated with the A and B channels. In LAB color, the A Channel defines the color values based how much green vs magenta there is. The B Channel defines the color values based on how much blue vs yellow is present.
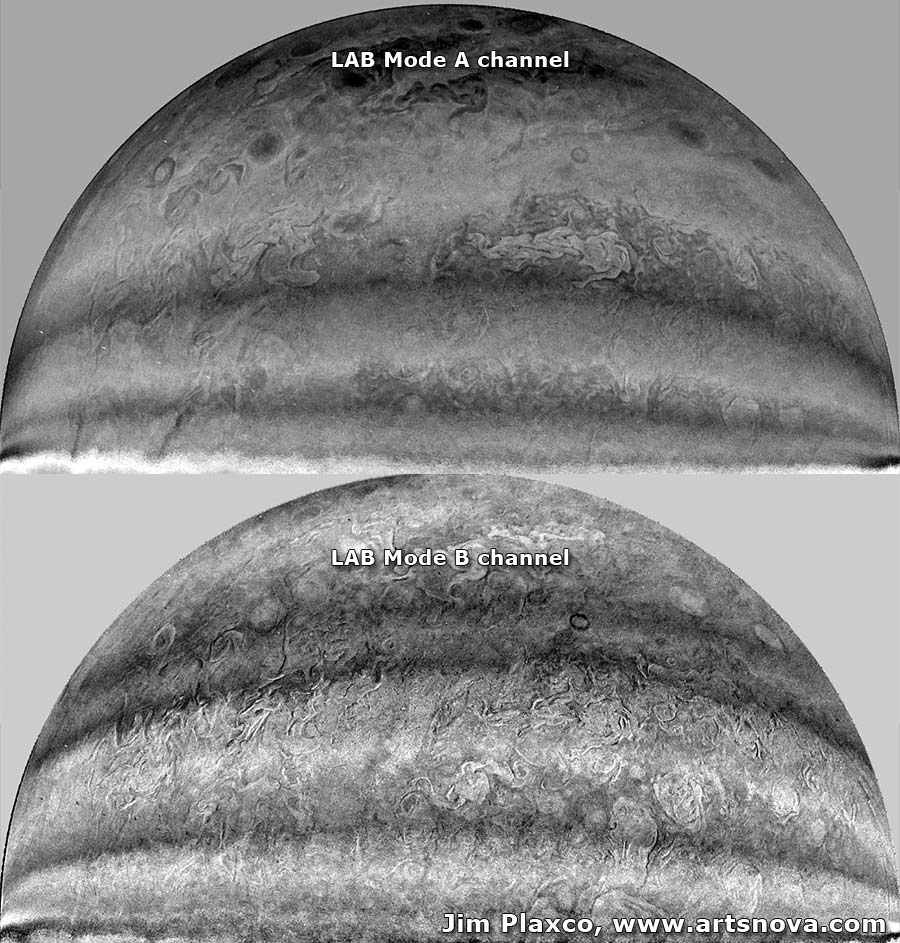
Image B: NASA Juno JunoCam LAB Mode Color Channels A and B Stretched to Reveal Artifacts
As you can see there is strong banding present in each of the channels. The challenge is to increase the natural constrast in the image without increasing the visibility of the artifacts. In a similar fashion I pushed RGB color to the max in Image C below to provide an alternate view of the artifacts hidden in the raw red, green, and blue channels.
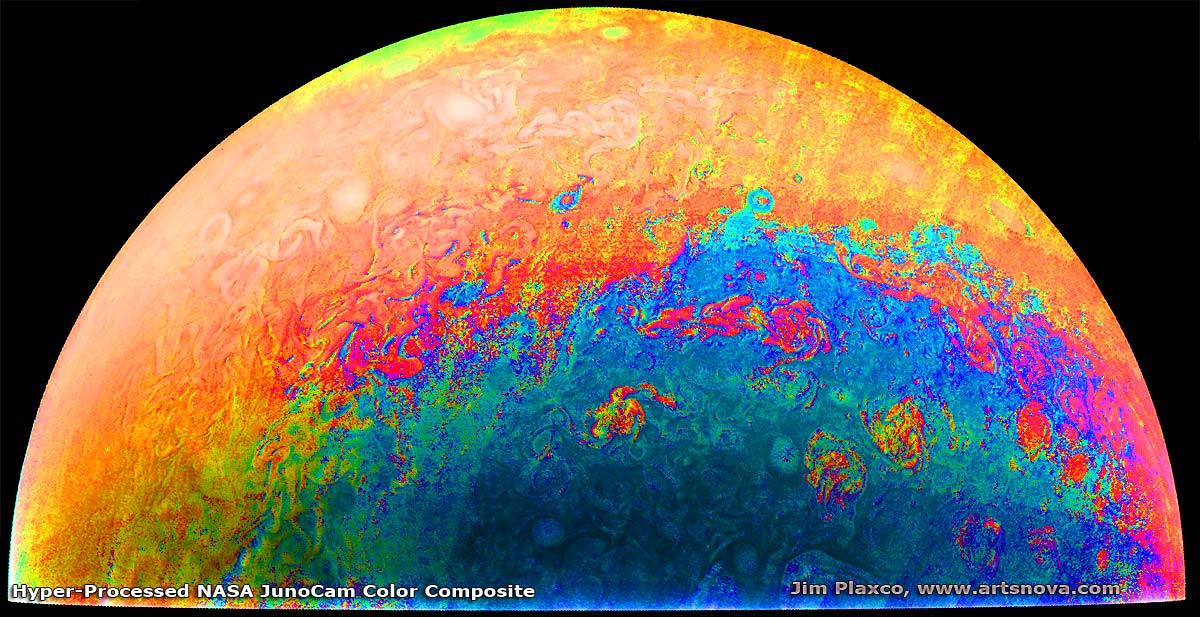
Image C: NASA Juno JunoCam Color Composite Hyper Processed
In addition to the artifacts issue, the JunoCam images also have a colorcast. If you look over the larger collection of JunoCam images you will see that they all have a yellowish-brown tint to them. This is not the Jupiter that we are used to seeing. This leaves us with the challenge of not only enhancing the color in these images but of removing the perceived colorcast. Alternatively, such color enhancements should be done in such a way that what gets created is not too far from reality - unless that is your intent.
The image below, Image D, is one of several image processing experiments I carried out with Imageset893. In this example, processed entirely within Adobe Photoshop, I pushed the contrast to bring out the cloud structure and did quite a bit of color manipulation.
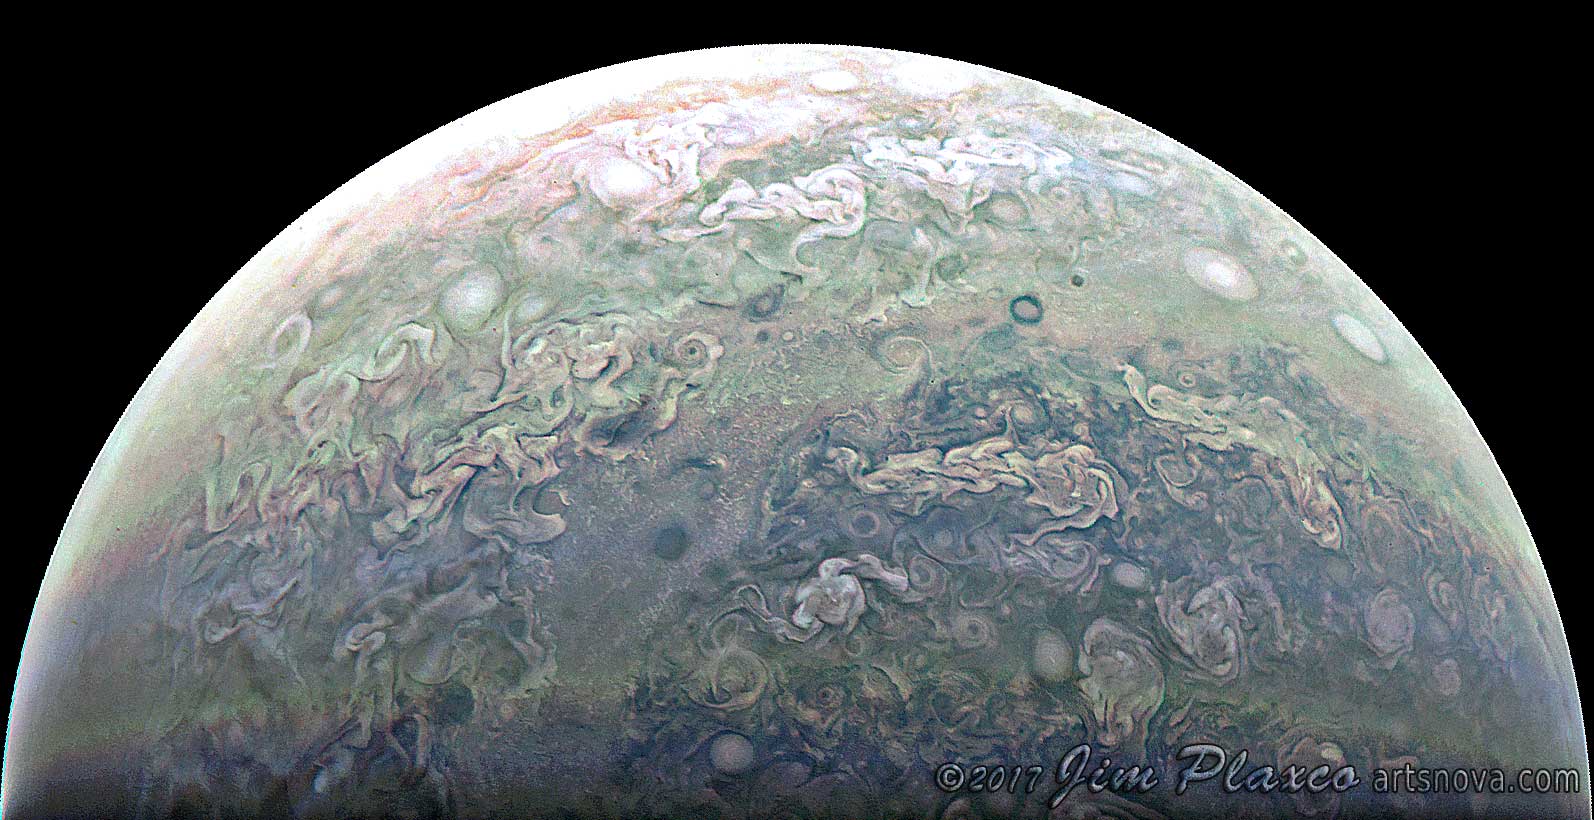
Image D: An Adobe Photoshop processed version of JunoCam Imageset893
While I was generally pleased with how this image turned out, you will observe that some areas are washed out and that some color banding is present. These are red flags telling me that I went too far with my pixel pushing endeavors. With additional work, namely the use of multiple adjustment layers masked to target specific areas of the image, I could have improved this image. But then this would not have served as a good example of what not to do.
I used another workflow to create the JunoCam image used to illustrate this article (the image at the very top). That workflow included using RawTherapee along with Adobe Photoshop to process the red, green,and blue channels. Image E below provides a side by side view of the central portion of three versions of the same image. On the left is the version used to illustrate this article; in the center is the color composite version provided by the JunoCam team; on the right is the Photoshop-only version shown in Image D. The Juno team's color composite serves as a useful baseline against which to judge your own image processing results.
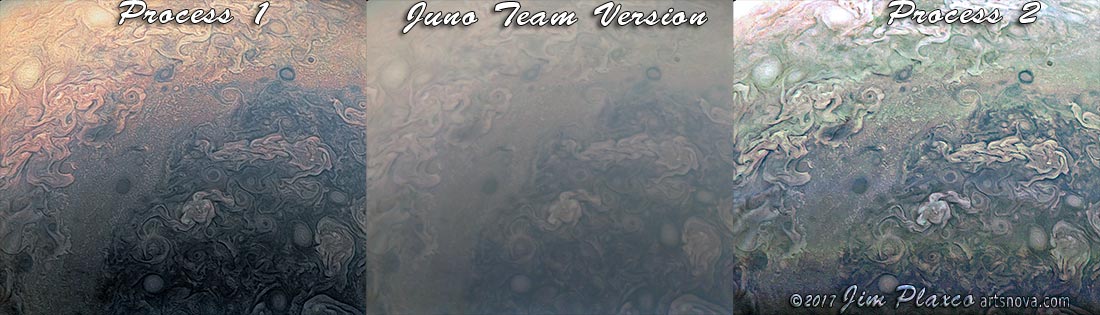
Image E: Adobe Photoshop and RawTherapee vs JunoCam Team Image vs Photoshop-Only Image Processing Compared
Considering the above three images (Process 1 / Juno Team Version / Process 2), which do you prefer? What would you do to create a more striking image than that provided by the Juno team? If you don't have Adobe Photoshop, there is always GIMP (GNU Image Manipulation Program) which is the predominant open source image editing alternative to Photoshop. To learn more visit the GIMP web site.
JunoCam Conclusion
JunoCam is the perfect opportunity for people to experiment with image processing and JunoCam's planetary science images. The JunoCam observations are all available from the JunoCam Image Processing Gallery. Not only are the raw JunoCam images available but so too are images that amateurs and professionals alike have processed and uploaded to the JunoCam web site for public viewing. These images can be an excellent source of inspiration. You can see the image I used to illustrate this article on the JunoCam web site at Perijove 5 Image set 893 Polar Time Lapse Sequence.
Taking the image one step farther, I decided to use it as the basis for a generative painting making use of one of the generativer programs I've designed. You can see that version of the image (created at a size of 10800 x 7200 pixels (36 by 24 inches when printed at 300ppi) at Juno Polar View of Planet Jupiter Generative Painting on Redbubble.
Another thing you can do on the JunoCam web site is to vote for your favorite images. For voting information, see JunoCam Public Voting on Images.
Unfortunately JunoCam is expected to have a fairly short life. The prediction is that it will operate only through eight orbits of Jupiter because of the rather deadly local radiation environment and powerful magnetic field.
So visit the JunoCam web site, download some images, fire up your favorite image processing software, and have some unique fun manipulating images of Jupiter.
Juno Fact: The Juno spacecraft achieved the highest speed of any spacecraft so far hitting 165,000 mph after its Earth gravity assist.