Swirly Planetary Rings and Photoshop
This is not a tutorial. It is a Not Tutorial. Confused? Hopefully it will all be clear by the time I'm done. More than once I have come across tutorials on how to use Photoshop to create planetary rings. In fact since this is totally Photoshop specific, it will serve as the inaugural posting to a new topic section devoted to Photoshop. While I have mentioned Adobe Photoshop in several previous postings, I have never gone into sufficient detail to warrant creating a Photoshop category – until now.
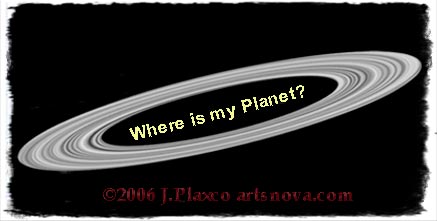
Back to planetary rings and Photoshop: there is a widely prescribed method for creating rings which I call the swirly clouds method because it relies on Photoshop's Twirl Tool. Let me give you a quick run through of how these tutorials proceed. We're not going to worry about the planet. Our focus is on the ring system and how it gets created.
- Start up Photoshop.
- Create a 1000 by 1000 pixel document.
- Fill the background layer with black.
- Create a new layer named Rings.
- Make the Rings layer the active layer.
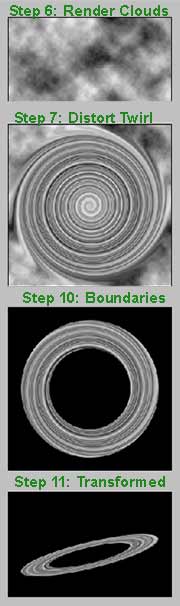
- Filter -> Render -> Clouds
- Filter -> Distort -> Twirl using an angle of 999°. Repeat two more times.
- Activate the Elliptical Marquee Tool
- Position your cursor at the center of the document and click-Alt-Shift to create a centered perfectly circular selection. Drag to the desired inner boundary for your rings, release, and press the Delete key to remove the inner swirly area.
- Position your cursor at the center of the document and click-Alt-Shift to create a centered perfectly circular selection. Drag to the desired outer boundary for your rings, release, press Shift-Ctrl-I to invert the selection, and press the Delete key to remove the outer swirly area.
- Ctrl-T to activate the Transform tool. Flatten and tilt to create the perspective you want for your planet's rings.
And that's all there is to it. Note that following step 10 you could have added noise, color, whatever. Not bad for five minutes work.
But there is a problem, especially if you want your rings to be big. Take a close look at the rings that you have just created and at the rings in the picture below.
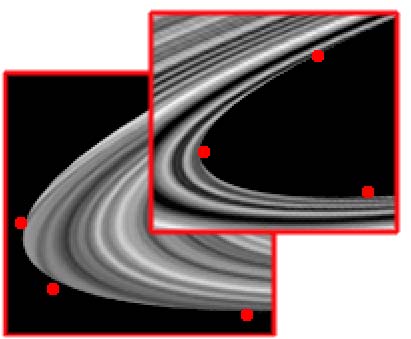
The red dots mark points where the rings appear out of nothing and disappear into nothing. These points are a direct result of using Photoshop's Twirl Tool to create a circular material. Granted they are not very noticeable but they are noticeable and not at all realistic. Real rings just don't work like that. While there may not be a quicker way to create rings for your planets, there are better ways.
My advice is if you are serious about your planet's rings and your rings are going to be large and you come across a Photoshop tutorial that expounds the basic twirly ring methodology: ignore it. Having said that, I will point out that the rings used to illustrate this “not” tutorial were made using the swirly rings method.
Note: It has come to my attention that Internet Explorer is unable to display the numbers for the ordered list used to identify the individual steps in the tutorial. Obviously IE is developmentally challenged. Firefox has no difficulty displaying the numbers
Ad Astra, Jim
| Return to the Blog Index | This entry was posted on Thursday, April 5th, 2007 at 7:30 pmand is filed under Photoshop, Space Art.
2 Responses to “Swirly Planetary Rings and Photoshop”
-
Never noticed that before. You allude to a better way of making rings. How about a hint? Thanks.
John
-
Hello John,
First let me apologize for taking so long to moderate your comment. I've been away from my blog for a number of days now and have not had the opportunity to check on comments.As to a better way of making rings, I must confess that the Photoshop Twirl Tool is the quickest and easiest way to create planetary rings that I have found. It takes more work, but rings can be created without the Twirl Tool – use the Gradient Tool instead. Note that there are various alternative approaches to creating rings with the Gradient Tool. The key is a willingness to experiment.
Ad Astra, Jim