Installing Processing 3.x on Ubuntu Linux Systems Tutorial

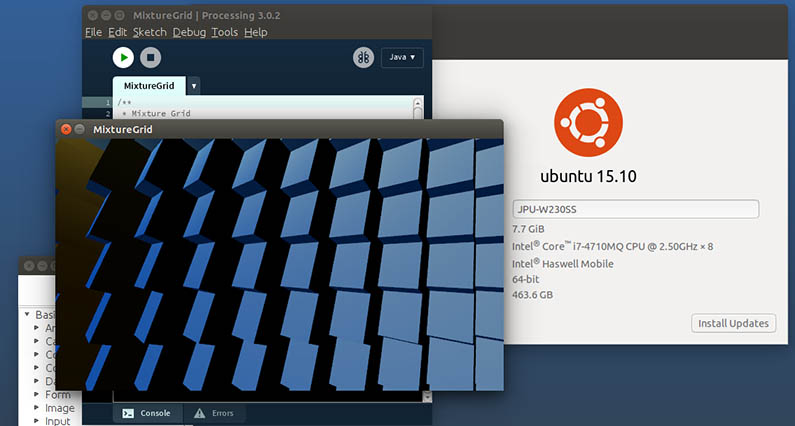
Processing 3.0.2 Running On Ubuntu (Wily Werewolf) Linux
I love Processing. It's a wonderful tool for digital creativity and my hat is off to Ben Fry and Casey Reas for their vision and dedication. Most of my work in Processing is done using Processing 2 on a Windows 7 system. However I also run Processing 2 on a Ubuntu Linux system. I don't use Linux as much as Windows because Linux is less user-friendly - hence this tutorial on how to get Processing up and running on a Linux system. And yes, this tutorial does involve typing in Unix commands from the Terminal.
Due to a corruption with my Linux system, I recently had to do a complete reinstall of the operating system and all my applications. It occurred to me that as long as I had to go through the process, I would document the steps I took installing Processing to serve as a tutorial for others.
To be clear, the instructions that follow are those I used to install the 64bit version of Processing 3.0.2 (released 02/13/2016) on a system running Ubuntu Linux 15.10 (Wily Werewolf). These instructions worked without incident on my system. However, this is no guarantee they will work for you. I also assume that readers of this tutorial are familiar with the gedit text editor and have used the Terminal to execute Linux commands.
Download Processing
The first thing to do is to download Processing 3 from https://processing.org/download/. I downloaded the Linux 64-bit version 3.0.2 dated 02/13/2016 - its filename being processing-3.0.2-linux64.tgz. Using the Firefox browser, the file was downloaded to the default directory /home/myUserName/Downloads. In Firefox, if I click the download icon I can see the file I've downloaded and if I click on the filename, my system automatically opens the file using the Archive Manager program.
You might be tempted to immediately extract (think unzip) the archive right away but if you do, you'll only have to move it later. That's because the location where you want to install Processing is in the /opt directory. The /opt directory is where you should install software you've manually installed on your system, as opposed to software that is installed using the package manager. At this point if you try to specify /opt as your extraction destination, you should get an "Extraction not performed: You don't have the right permissions to extract archives in the folder "opt"" error message. This is because the /opt directory is outside your user directory. This is standard and is a part of the security built into Linux.
Extract Processing Using the Archive Manager
To get the Processing archive into the /opt directory, open a Terminal session (shortcut Ctrl+Alt+T) and type in the following command:
sudo file-roller
Yes, the executable file that is the Archive Manager program is actually named "file-roller" Note that after entering this command you will be prompted to enter the password that is associated with your user account - that's because you've used the sudo command.
As a consequence of issuing the above command, the Archive Manager window should now be open.
Use Ctrl+O to open a file selection dialog and navigate to where your Processing file (processing-3.0.2-linux64.tgz) is located and select it.
Once the file has been selected, right click on the filename and select the Extract option.
Navigate to where you want to install Processing - I click Computer and then double-click the directory named opt.
Once you're in the opt directory, click the "Extract" button. Your Processing archive will now be unpacked to a directory named Processing-3.0.2.
You are now done with the Archive Manager so go ahead and close it.
Back in your Terminal window, navigate to the directory where you just extracted Processing. For my installation I enter the following command:
cd /opt/Processing-3.0.2
Now issue the following command to list the contents of the directory:
ls -l
This is just to see that the file named "Processing" really is marked as being executable (I assume you know about file permissions and the output format of the ls command).
While we're here, let's see if Processing works. The Processing file is a shell script that is used to get the Processing system up and running. I suggest that after you have installed Processing that you go in and take a look at the contents of the Processing script as a way of better understanding what the script does.
Start Processing by entering the following command:
./processing
Note that you need to use the prefix "./" because when you type in a command, your system will search for the executable file based on the contents of the $PATH environment variable - which is a list of the directories where executables are located. If you want to execute a program whose path is not in $PATH you need to enter the complete absolute path to where the file is stored. In this case since we are in the same directory as the file we want to execute, we can get away with simply using the "./" prefix, which is a shortcut that means the current working directory.
Alternatively you could have entered the following command:
/opt/processing
On my system, the Processing IDE started with no problem. Great - the IDE works. Next is a test to see if Processing can actually run sketches. The easiest way to do this is to run one of the example sketches accessible via File -> Examples. I selected an example sketch at random, clicked the RUN icon and watched the sketch run. Now I know that Processing 3 is fully functional on my system - but I'm not done yet.
Create a Processing App Launcher for Ubuntu Unity Desktop
Processing is installed but it is not easily accessible. The last thing I want is to have to open a Terminal session and manually type in a command every time I want to run Processing. Instead I want a desktop icon I can just click whenever I want to start Processing.
First we'll tell Ubuntu where it can find Processing. What we'll do is to add the Processing folder to Ubuntu's $PATH environment variable by creating a symbolic link. We'll do this using the following command:
sudo su -c "ln -s /opt/processing-3.0.2/processing /usr/local/bin/processing"
And because we're using sudo, we'll be prompted to enter our user account password.
Now, change to the applications directory using the following command:
cd /usr/share/applications/
We will now create and edit a launcher file for Unity (Unity being the graphical shell for the GNOME desktop environment developed by Canonical for Ubuntu). Start by entering the following command - which will create the file processing.desktop and simultaneously open gedit so you can edit the file:
sudo gedit /usr/share/applications/processing.desktop
Now just paste the following code into the file:
[Desktop Entry]
Version=2.1
Name=Processing
Comment=Processing Rocks
Exec=processing
Icon=/opt/processing/lib/icons/pde-256.png
Terminal=false
Type=Application
Categories=AudioVideo;Video;Graphics;
Now save the file and exit gedit. Note that on my system, running gedit resulted in some error messages being printed out in my Terminal session. I ignored them. Instead I just verifed that my file was created and contained the content I pasted into it by using the following command to list the file's contents:
cat processing.desktop
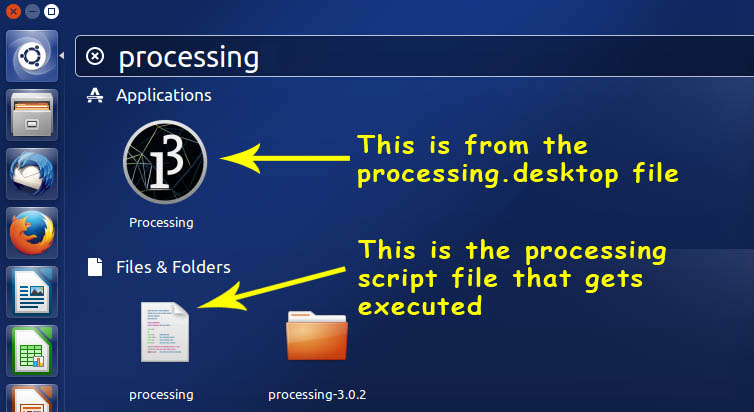
Next let's make sure what we did worked. Go to the Unity Dash and in the search field type in "Processing". You should see a result for Processing that displays the Processing icon - as illustrated in the image below.

Search for Processing in Ubuntu Unity Dash
Clicking the Processing icon will launch the Processing IDE. If you don't see the Processing icon, double check everything you did in the Create a Processing App Launcher for Ubuntu Unity Desktop section of these instructions. If you did everything right and it is not working, your best option is to ask for help at Ask Ubuntu as this is not a Processing problem.
Add Processing to the Unity Launcher
While launching Processing from the Dash is okay, it is much easier to access Processing by adding its icon to the Unity Launcher. To do this, just take the Processing icon that appears in the Dash and drag it onto the Launcher, positioning it where you want it to appear.
Note that there are two ways to add programs to the Launcher. The second way is to first start Processing. Once running, a Processing icon is temporarily added to the Launcher. To make the Processing icon stay there, in the Launcher right-click on the Processing icon and select the option "Lock to Launcher". While this is how folks are typically told add programs to the Launcher, this will not work with Processing because when started, Processing simultaneously creates a file for your sketch and this file gets associated with the Processing icon you've just locked to the Launcher. So don't even try to use this method.
For a generalized treatment of the subject of making programs "launchable", see Ubuntu Unity Launchers And Desktop Files
Associate PDE sketch files with Processing
As a rule I start Processing and then just use Processing's File -> Open (Ctrl+O) dialog to open my PDEs. However, if you want to be able to use Nautilus or another file manager of your choice to double-click a sketch and have it opened in Processing, there are some steps you need to take.
The process involves creating a MIME type for your PDE files. For more on the subject see the GNOME Developer article Adding MIME types.
Our first step will be to create a MIME type for files that have the extension .pde so its back to the Terminal. Issue the following two commands:
cd /usr/share/mime/packages
sudo gedit processing.xml
Paste the following code into the file:
<?xml version="1.0" encoding="UTF-8"?>
<mime-info xmlns="http://www.freedesktop.org/standards/shared-mime-info">
<mime-type type="text/x-processing">
<comment>Proecssing PDE sketch file</comment>
<sub-class-of type="text/x-csrc"/>
<glob pattern="*.pde"/>
</mime-type>
</mime-info>
We have just created an XML file named processing.xml that defines a MIME type for files with the extension ".pde". Now we need to add this file to the MIME database. We do this using the following command:
sudo update-mime-database /usr/share/mime
Note that this command make take some time to complete.
Now the PDE MIME type needs to be associated with the Processing application. To do this, we need to add an entry to the file defaults.list so issue the following command:
sudo gedit /usr/share/applications/defaults.list
This is a file with a fair amount of content to which you are going to add one more line. I suggest looking through the file and finding the first entry that begins with the string "text/x". Insert the following line of text at this point in the file:
text/x-processing=processing.desktop
Save the file and exit gedit. Now when you double-click a .pde file, your system will automatically start Processing and open the sketch. As a quick check you can use Nautilus to navigate to /opt/processing-3.0.2/modes/java/Examples and select one of the example programs from one of the subdirectories. Or just use Nautilus to search for PDE files (.pde).
I sincerely hope that these instructions work as well for you as they have for me. If you are having difficulties that seem to be more tied to Processing than to Linux, you may want to ask for assistance on the Processing Forums.
Processing and Ubuntu Reference Links
- Ubuntu 15.10 Release Notes
- Changes in Processing 3.0
- Download Processing
- Processing Forums
- Ask Ubuntu (support forum)